Showing posts with label fall decor. Show all posts

Friday, October 30, 2015

Dill House Diary // Our Fall Front Porch


Every year, I look forward to purchasing mums and pumpkins for autumn decor. Sure, I realize mums may be a bit cliche when it comes to fall decorations, but I love them. When I was a little girl, planting flowers with my mom was one of my favorite things to do. We planted petunias and pansies in the warm months, mums in the cooler months. Hedges consisted of hydrangeas and knockout roses. It's just the way things were. So now, as an adult with a place of my own, I carry on the flower tradition: roses in the hedge, mums on the porch.

This year, I added this lovely burgundy coleus plant. Of course, on crisp fall nights when the temperature dips too low, I have to bring in the coleus to keep it from freezing. (Two weeks ago, I forgot the poor plant and had to coax it back to life in the front of the radiator. It was very sad.) The addition of a few white pumpkins completed the ensemble. Now, we have a bright, inviting front stoop--ready for all of Frederick's little trick or treaters. If you're in the downtown Frederick area, keep your eye out for us. We're the grey rowhouse with all the flower pots!


If you're new to the blog, check out our Renovation Diary to read more about the history of our little house and our many renovation projects.


Wednesday, October 7, 2015

Fall Crafts // Wooden Autumn Blessings Sign


Sunday I sat down to edit and schedule this week's blog posts... only to discover that I had lost my laptop charger! Ack! Thankfully, I finally found it--left behind when I left work last weekend. Poor innocent little charger, left abandoned to its own devices all weekend. (Pun intended.)  I'm so glad I found it! But hence the lack of posts this week so far. Thankfully, we're all plugged in and back on track now! 

Today I thought I'd share this little "Autumn Blessings" sign I made a few weeks ago. It's relatively simple and fun. If you ask me, SIMPLE and FUN are two major necessities of any craft or DIY. I can paint, but when it comes to power tools or complex procedures... I'm lost. If you fit into this category too, then this DIY is for you. 

Last month, I completed a commissioned art project for a local couple. They wanted some cutesy wooden signs for their Harpers Ferry cottage. When finished with their project, I had some left over scrap wood. Rather than let it go to waste, I thought "Why not make a cute fall sign?" I got out my chalkpaint, brushes, and sandpaper and got to work. 


What You'll Need:
- Scrap wood, sanded (mine measured 18x6, cut to size by the hubs)
- chalkpaint (I used FolkArt chalky paint)
- acrylic paint
- assorted brushes
- paint markers
- sand paper or sanding block
- paper towels

What You'll Do:
- Cut the wood to size. 
Because this was a scrap piece of wood, I went with the size it already was. It measures about 18 inches by 6 inches. Mark did the cutting for me since I have a silly fear of saws and blades!

- Prep the wood. 
I bought pre-sanded wood when I made the commissioned signs. It's easier to paint and saves you the trouble of sanding down the entire piece. However, I did have to sand the edges after Mark cut the wood to size. You don't have to do this step, but I think it makes the end result look a little nicer.

- Apply your background color. 
I used two FolkArt chalky home decor paints: Sage and Savannah. First, I applied the Savannah color, a dusky tan. I let it dry almost completely. Then, I applied a second coat of paint in the pale turquoise Sage color. I intentionally applied it when the base coat was still slightly tacky, resulting in a somewhat streaky, blended color. I just liked the shabby-chic look it gave the piece. 

Note: If you're using treated wood, you should only paint one side. Treated wood needs to "breathe." 


- Once the base coats are dry, use the paint markers to write your quotation. I chose the phrase "Autumn Blessings" because it seemed like it would continue to be applicable into the Thanksgiving holiday season. 

- Add decorative touches. I went with two shabby-chic style pumpkins. I drew the design with the paint markers and then filled them in with acrylic paint from my studio stash. 


These final two steps are optional. 

- Seal the sign using a spray lacquer or polyacrylic.
I prefer the spray kind because it doesn't streak like the other kind. Just follow the directions on the spray can. I bought mine from Home Depot. 

-Add hanging hardware to the back of the finished sign if you plan to display it somewhere. 


See? Simple and fun, just like I promised. The whole project took me about 30 minutes. I plan to display the little sign in our dining room until it sells from my Etsy shop. 

Happy painting! 


Follow

Thursday, October 1, 2015

Decorating Your Home with Fresh Flowers


Deep crimson, yellow ochre, dusky blues, and berry-bright orange-- these moody, jewel-tones have always been my favorite colors with which to decorate our home. Even when the rest of the world gravitates to white-washed pastels and farmhouse chic, I cling to the dramatic and the eclectic: bold patterns, mismatched textures, and funky colors. So of course, when fall rolls around, I'm thrilled! Finally the rest of the world dons it's autumnal hues-- my absolute favorite color palette.

One way that I love incorporating fall into our home decor is through the use of fall florals. Typically, when you think of using fresh flowers in your home decor, you probably think of it as a spring and summer accessory. But fall brings a plethora of floral options: succulents, pumpkins, sunflowers, wheat stems, dried hydrangeas, berries, dark roses, leafy branches, and of course the quintessential mum. Every year, I decorate our front stoop with mums and pumpkins. But I also love to incorporate fresh autumn flowers into our interior seasonal decor. There's just something about fresh flowers that cheers up a room.

Today, I wanted to share some ways that I've utilized flowers in our fall decor along with some inspiring ideas  from BloomNation.


Tip: Pick flowers that match your home's color theme. 

With its chocolate brown walls and broad leather couch, our living room is without a doubt the coziest room in the house. A common color thread throughout the room is yellow ochre. So when I saw yellow Craspedia (also called Billy Balls) at our local market, I had to buy them. They're so simple but just add a touch of whimsy to our decor. Plus, their bright mustard yellow color perfectly matches our color theme.


Tip: Choose flowers that will last a while, like sunflowers. 

The Craspedia in our living room have been in their vase for a little over a week. I regularly change the water-- I aim for once a day--and they still haven't lost their fluffiness or color. Some flowers, like tulips, are stunning but can wilt pretty quickly. You can always try placing your fresh flowers in the fridge overnight, but if you're like me, you may not have much room in there. Especially if you meal prep! So ask your local florist for flowers that will last a little longer in an arrangement. One of my long-lasting favorites for fall? Sunflowers.


Tip: Choose fluffy flowers that give you more bang for your buck.

Anyone who has ever planned a wedding knows that bigger, fluffier flowers are the way to go. You get more volume for less money because you're buying less stems. In our wedding, I purchased huge clumps of baby's breath, tied them with burlap ribbon, and put them into galvanized tin buckets for an inexpensive yet dramatic aisle decoration. Now, in my home, I love using hydrangeas because one or two stems create a voluminous bouquet for our dining room table.


Tip: Add texture through greenery, berries, or branches. 

Yesterday, my husband came home with a stunning fall bouquet: an eclectic mix of greenery, roses, sunflowers, and berries. While uniform bouquets can be beautiful, I love the textural interest that this bouquet had. I added two more branches to create vertical height alongside the soft greens and bold crimsons. In my opinion, textural elements like berries and branches really work well in fall decor because they evoke memories of long woodsy walks and campsites.


Tip: Don't be afraid to experiment. 

Not a huge fan of flowers? Or have allergies? Instead of a traditional bouquet, display a branch of changing leaves or even use wheat stems like the fall centerpiece we shared a few days ago.  You can even experiment with unique containers: a pumpkin, a bucket, or tea tins. Vintage or rustic containers really add to the fall flavor.

Need some inspiration? One of my favorite Instagram accounts and Pinterest boards is BloomNation, a community marketplace for discovering talented local florists. i started following them on Instagram @bloomnation awhile ago. Because, frankly, who doesn't love a feed full of stunning flowers? They give tidbits of flower arranging advice and can help you find a really unique florist in your area, just by typing in your zip code. In fact, all of the images posted today are from BloomNation, used with permission of course.

Disclosure: I received no compensation for this post. All opinions expressed here are my own. 

Images sources:  top image: mine // all other images:  BloomNation Pinterest board (used with permission)

Thursday, September 24, 2015

Fall Crafts // Chalkpaint Pumpkin Pillow DIY


 A few weeks ago, I came across Stone Gable blog, a beautiful blog with farmhouse decor galore. Its writer Yvonne shares several adorable farmhouse-style decor tips, including this post on fall pillows. I quickly subscribed to the blog (and you should too!) and since have loved reading her recommendations and tips for home decor. I decided to try my own farmhouse fall DIY, inspired by Stone Gable. And what better way to achieve farmhouse style than with chalkpaint?


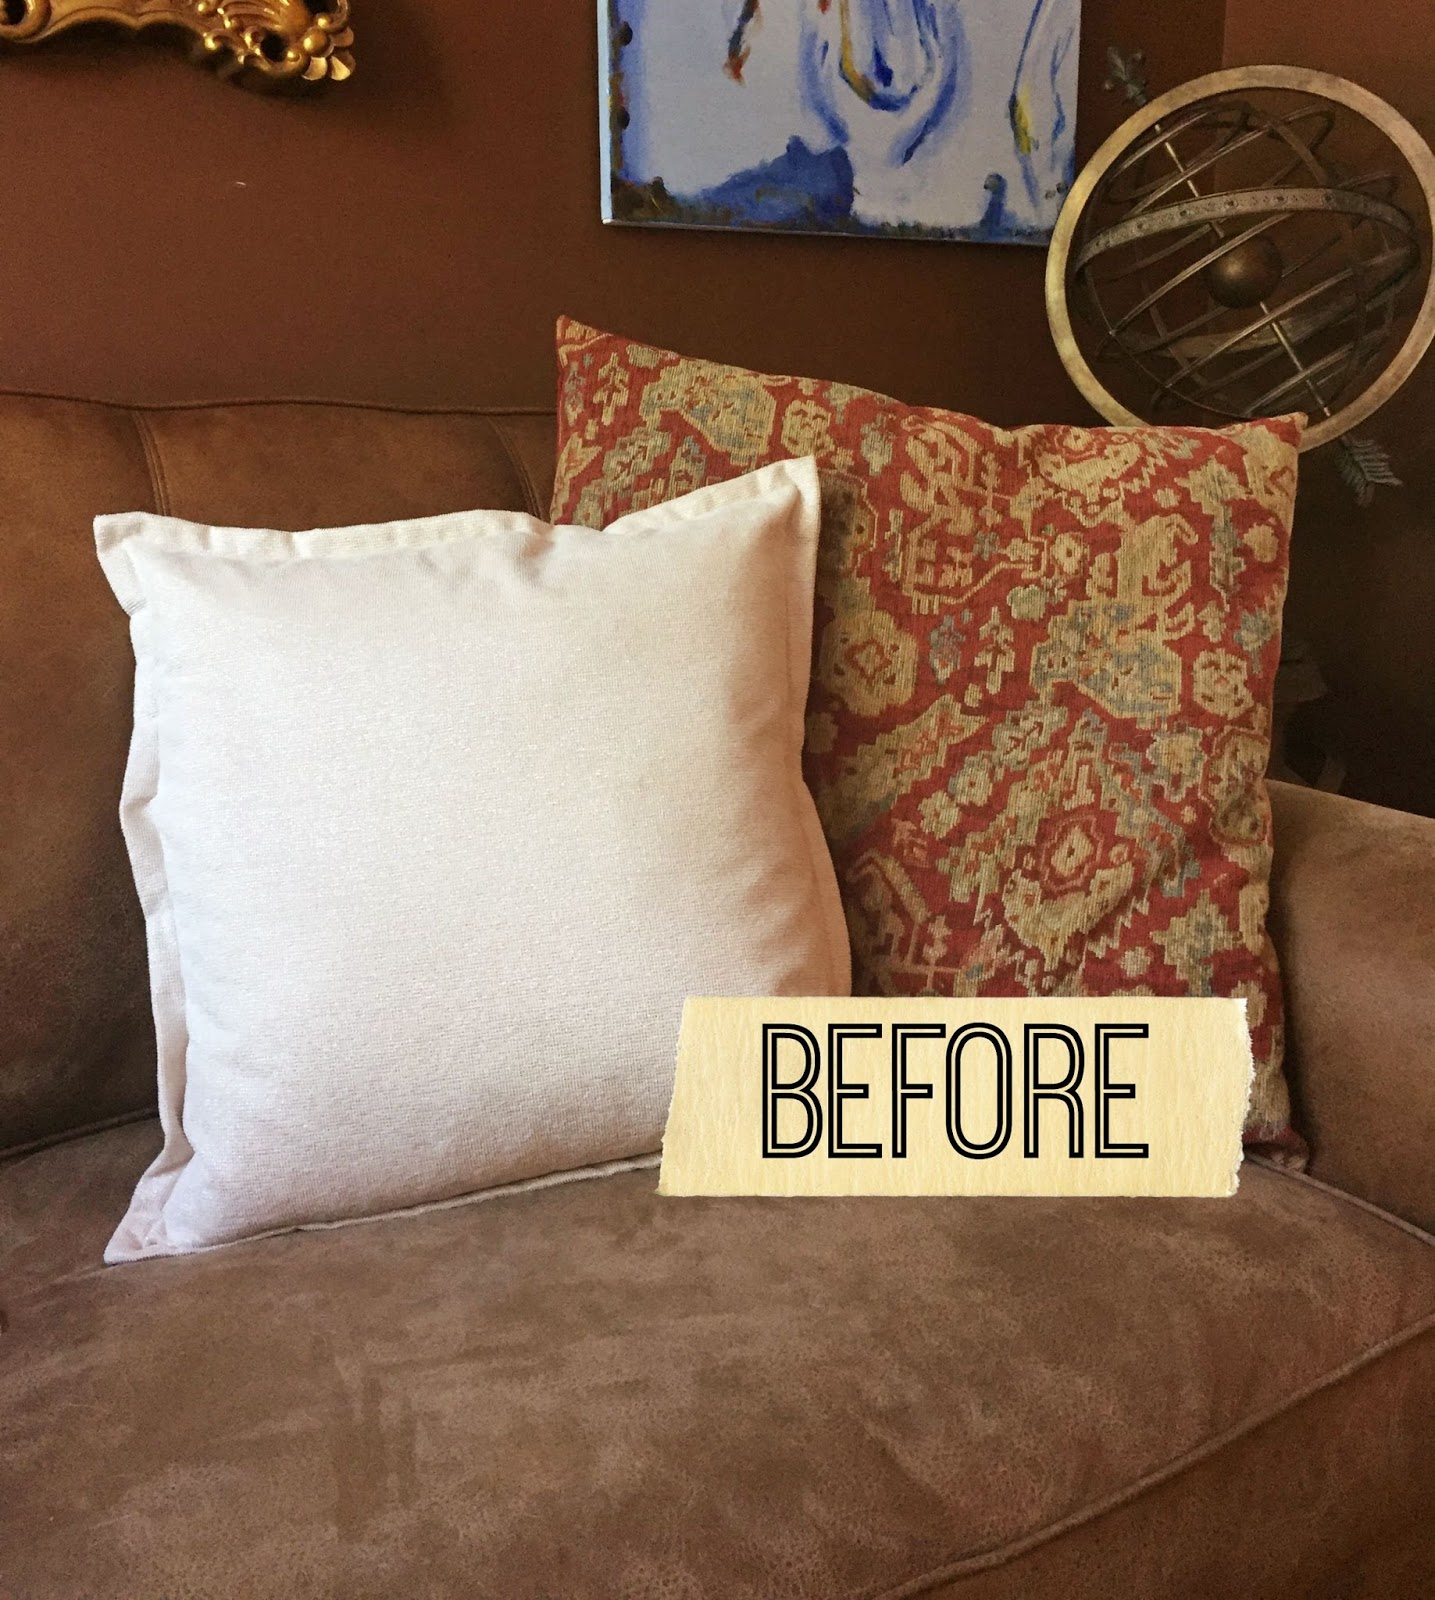
This fall DIY was both cheap and easy. I found this cream pillow in the clearance section at HomeGoods. At only $10, the pillow was much cheaper than a pillow cover and insert! It's kind of hard to tell in the photos, but it has a slight shimmery thread running through it. I was a little nervous about using chalkpaint on the fabric, but I had always heard that it was possible. So why not give it a try?

For this project, I didn't use Annie Sloan, my usual chalkpaint go-to. Instead, I used another brand: FolkArt Home Decor paint. You can actually purchase it online from JoAnne craft stores, although I ordered mine through Zulilly. 

What You'll Need:
- a neutral pillow or pillow cover
- chalk paint in colors of your choice
- assorted brushes


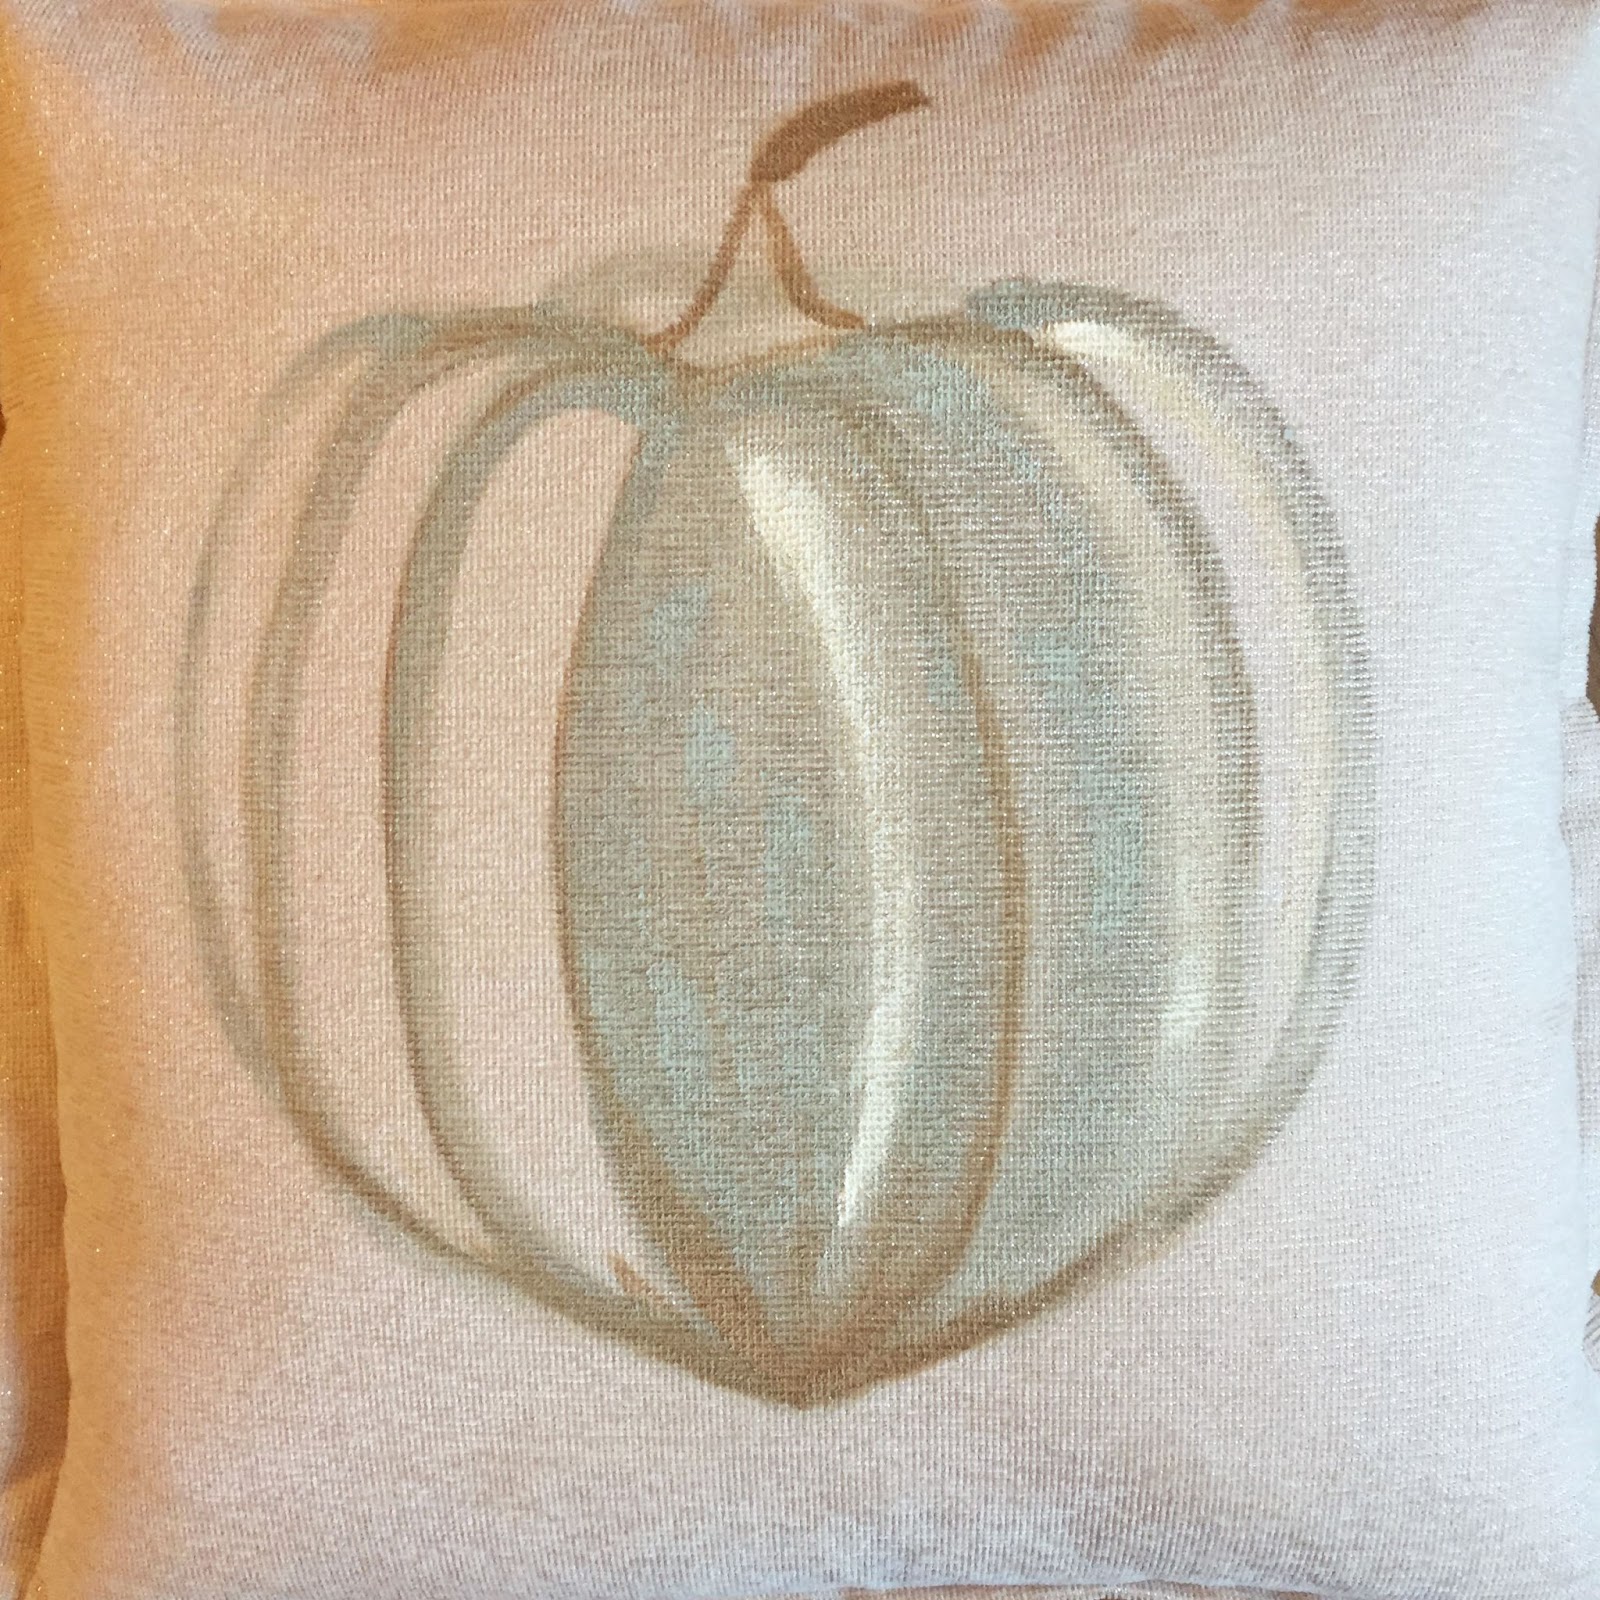
If you can draw a basic pumpkin, you can do this DIY. For my pillow, I used Folk Art's colors Sage and Savannah. I traced the round pumpkin body in the pale turquoise Sage color and then added the stem in Savannah brown. The next step was to simply fill in the lines! The chalk paint adhered to the fabric in kind of a "streaky" way-- which totally worked for the shabby-chic vibe I was going for. I added a streak of creamy white acrylic paint (pulled out of my paint box) just to add a bit of "highlighting." 

And that easily... the pillow was done! Like all chalkpaint, the pillow dried quickly. Wondering how it "feels" to the touch? Kind of like an applique or like outdoor fabric. It's not as smooth as the original feel, but it seems like it will hold up well. For cleaning, I would probably recommend just spot-cleaning with a warm cloth. 


If you're into chalkpainting, I highly recommend trying it out on fabric like this. I love the way the pillow looks on our couch. It's the perfect touch of fall! Not over the top, but just a little festive.

Do you like decorating for fall? Or are you one of those people who dreads the holiday/seasonal decor posts like this? Haha! Well, I hate to break it to you, but I'm all about pumpkins and fall, so you might want to bear with me over the next few weeks.

This post shared at:
My Favorite Things Link Party
The Party Bunch Linky Party
A Little Bird Told Me Link Party

If you're visiting from those lovely blogs, welcome. Well, actually, welcome
either way. I hope you'll stick around. Check out our About page for top
posts and the basic need-to-knows. Happy reading! 

Wednesday, September 23, 2015

Fall Crafts // Wheat + Berries Table Arrangement


This year, I've really gotten into decorating for fall. I don't know if it's a side effect of being around so many inspiring creatives at the Frederick chalkpaint and antique stores, but I've found myself brimming with ideas for fall decor and crafts.

One super-easy fall craft that I really enjoyed was this Wheat and Berries Table Arrangement. It's incredibly easy and required a few simple materials and just a few minutes of my time. Which, as you all know, easy DIY's are what it's all about.

When picking out my centerpiece look, I decided to go with wheat and berries because I wanted to get volume without a lot of effort. I'm no florist, so my flower arranging skills are somewhat limited. I had the turquoise glass container on hand, an old find at HomeGoods.

What You'll Need:
a cute container
faux wheat (varying sizes)
faux berry stems
tiny pumpkins
table runner


What You'll Do:
- Arrange the wheat steams around the perimeter of the container.
- Building upwards, insert the berry stems and then the tallest wheat stems.
- You want the arrangement to build upwards, almost in a triangle shape.
- Fluff to create volume and a "messy" look. You may not go for this look, but I wanted it to look kind of haphazard, as if we just grabbed some twigs and wheat and tossed them in the pitcher.  There's probably a florist out there cringing at my ineptitude right now. My apologies, Anonymous Florist.
- Arrange the pumpkins at the base of the container. Again, try to go for a jumbled look.

This simple design is one of my favorite fall tables so far. I really love the natural feel it has. The rustic table runner paired with the smooth glass and white pumpkins creates an eclectic vibe that perfectly suits our home's decor. Also, an arrangement I don't have to water? Well that's even more of a plus.


Our chalkboard statement wall is the perfect seasonal backdrop. An eraser and a bit of chalk are the only tools needed to create a cute holiday banner. As a white girl, I of course had to represent my species with a pumpkin spice themed design.

Stay tuned for more fall crafts and ideas. I'll be posting several more over the next few days as we decorate for fall.


Similar posts:


This post shared at the A Little Bird Told Me Link Party and featured at Mama's Happy Hive. 

Mama's Happy Hive

Tuesday, September 15, 2015

Fall Crafts // Painted Pumpkins (Kid Friendly!)


Pumpkins and mums-- they're fall staples that I just can't imagine not including on the front porch. Each year, picking out the perfect, round pumpkins and the fluffiest mums gives me those happy tummy bubbles. The same ones that come with the first sip of cider and the first crunch of leaves underfoot.

When I was a little girl, I loved picking out the perfect jack'o'lantern pumpkin with my dad. We always went for one with that unique, squatty shape. Perfect for carving a goofy grin. Mark and I don't have kids of our own yet, but picking out pumpkins with my two little nephews proved how special this little childhood act really is. It's a great way to spend a fall weekend with your kiddos: roving through the pumpkin patch or wandering through your local farmers market. There's just something about the way their little faces light up about something so simple. It really just warms your own heart, and you can't help but smile too. It's nice when the biggest worry of the day is whether this fat pumpkin or that funny long one is better suited for a jack o'lantern.

But maybe you don't want your littles playing with knives? No worries. Have them paint their pumpkin instead. In fact, you can pick the smaller "pumpkin pie" pumpkins especially for this purpose. After all, what kid doesn't love getting their hands good and dirty with paint?


Get as creative as you want! You can use finger paint, puffy paint, or even glittery paint. Try out interesting designs with stencils, lace, or doilies to create unique effects. You can collaborate on a pumpkin as a family or give your kids their own little project. Best of all, this project gives your kids the opportunity to be completely creative, to just unleash whatever their little minds have imagined.

 I mean, how often do we get the chance to get good and messy?


And this project isn't exclusively for kids. It's a fun project for a ladies (or guys!) craft night. One of my favorite fall memories is painting pumpkins with my good friend Amber. I had this random idea to use pumpkins in my and Mark's October wedding, but didn't like the fact that bright orange would clash with our color scheme. So, I painted them white and added decorative swirls in puffy paint matching our wedding colors of plum and champagne. Check out our wedding post series to see how my "wedding pumpkins" turned out.

The best part of this fall craft? It's so brainlessly easy. All you need is paint and a pumpkin. You can't really go wrong. The finished product will add a little whimsy to your front porch decor, and your kiddos will be proud of their little contribution. Don't you just love the crazy-green pumpkin my nephew and I painted? Also, I'm pretty impressed with our collaborative effort on this one:


I know, I know. He's a little baby genius. I mean, I may be biased but come on... how could you not just be head over heels for that adorable grin and those grey-blue peepers? We had so much fun! Definitely give this a try.

Some themes to get you started:
- show your team spirit with football themed pumpkins
- use glitter spray paint and lace to get a glam effect
- paint your house numbers on them
- stencil your initials
- go crazy with pattern like these found on Pinterest

Comment below or tag me on Instagram with pics of your painted pumpkins! I'd love to see how they turn out!

Happy punkin pickin'!


Related Posts Plugin for WordPress, Blogger...